

How to Overclock Your GPU Safely (Step-by-Step 2026)

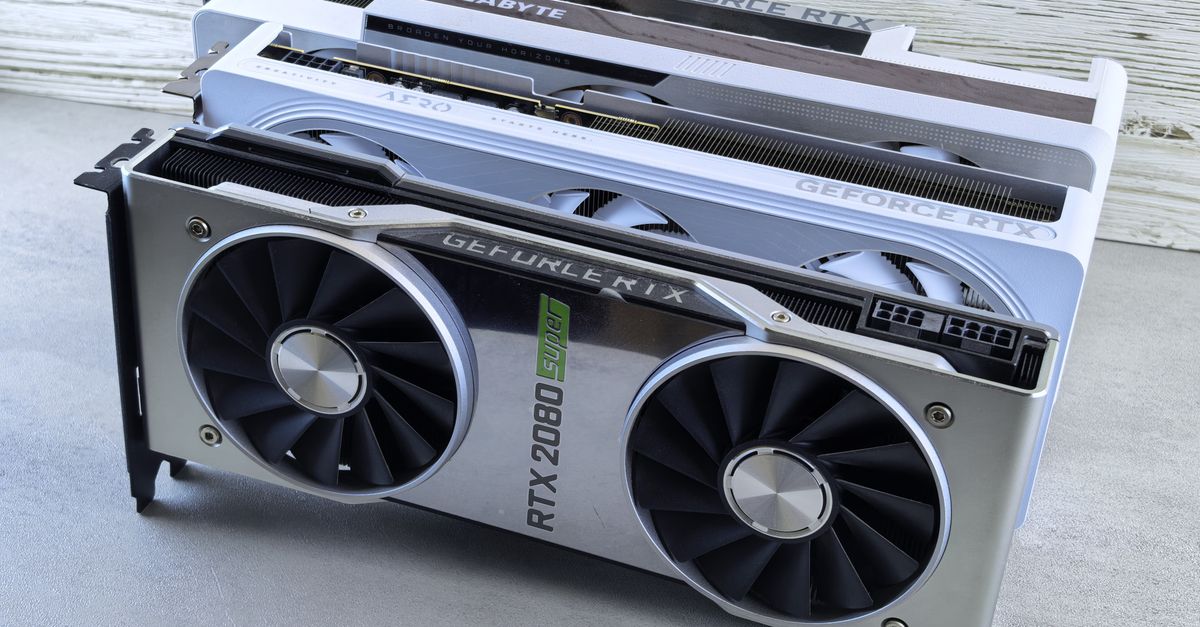
How to Overclock Your GPU Safely (Step-by-Step 2026)
Photo by Andrey Matveev on Pexels
Quick Answer: Safe GPU overclocking in 2026 follows a repeatable 3-phase process: (1) Baseline — benchmark stock performance and set safe power/temp limits, (2) Overclock — incrementally increase core clock (+15 MHz steps) and memory clock (+50 MHz steps), stress testing at each step with FurMark or 3DMark, (3) Undervolt (recommended over overvolting) — find the lowest stable voltage at each frequency point. Modern GPUs (RTX 5090, RX 9070 XT) have built-in boost algorithms that leave little headroom — expect +3-8% core clock gains on NVIDIA, +5-10% on AMD. Memory overclocking yields +5-15% in bandwidth-bound scenarios. Risk of permanent damage is near-zero if you stay within the voltage limit (1.1V max for NVIDIA, 1.2V max for AMD). The real risk is instability, crashes, and data corruption. Always use GPU-Z to monitor for memory errors.
Safety First: What Can Actually Break Your GPU
Risk Levels
| Action | Risk Level | Can It Break Hardware? |
|---|---|---|
| Core clock increase (within voltage limit) | Very Low | No — at worst you crash |
| Memory clock increase | Low | Rare — memory errors cause artifacts, usually temporary |
| Voltage increase (minor, +50-100mV) | Medium | Can degrade transistors over months |
| Voltage increase (aggressive, +200mV+) | High | Can kill GPU in seconds |
| Power limit increase | Low-Medium | Extra heat can accelerate fan wear |
| Fan curve adjustment | Very Low | Fans wear faster if set to 100% always |
| BIOS flash (VBIOS mod) | Very High | Can brick GPU permanently |
| Shunt mod (physical resistor mod) | Very High | Fire risk, void warranty |
Real Damage Scenarios
| Scenario | Likelihood | Result |
|---|---|---|
| Crash from unstable OC | 100% (at some point) | Save work, reboot. Zero damage. |
| Artifacts / screen corruption | 30-50% (if pushing hard) | Reduce OC. Damage to game in progress (save file corruption possible) |
| Driver timeout / TDR | Common | Driver restarts. Fine. |
| Thermal shutdown | Rare (if airflow blocked) | GPU emergency shuts down. No damage if it only happened once. |
| VRAM permanent damage | Very rare | Only if voltage to VRAM was increased (don't do this) |
| GPU core degradation | Rare (<1%/year) | From sustained high voltage + temp for months |
Golden Rules
1. NEVER exceed 1.1V core voltage on NVIDIA RTX 40/50 series
2. NEVER exceed 1.2V core voltage on AMD RX 7000/9000 series
3. Memory voltage: NEVER touch it (auto only)
4. Keep core temperature below 85°C (ideally <75°C)
5. Keep hotspot temperature below 100°C (ideally <85°C)
6. VRAM temperature below 95°C (GDDR6X runs hot)
7. If you artifact, crash, or freeze: reduce clock by 30 MHz and retest
8. Always test for at least 30 minutes before calling it "stable"
Tools You Need
Essential Tools
| Tool | Purpose | Download |
|---|---|---|
| MSI Afterburner | Overclocking + monitoring | Guru3D |
| GPU-Z | Monitor memory errors, sensor monitoring | TechPowerUp |
| 3DMark (Steam) | Stability benchmark (Time Spy, Speed Way) | Steam ($35) or demo |
| FurMark | Stress test (GPU burner) | Geeks3D (free) |
| Unigine Superposition | Stability + artifact detection | Unigine (free) |
| OCCT | Power stress test + error detection | OCCT (free, paid version) |
| HWiNFO64 | Detailed sensor monitoring | HWiNFO (free) |
| NVIDIA/PowerShell | Enable voltage control (NVIDIA) | Built-in |
Install Order
- Install GPU-Z (smallest, start with sensors view)
- Install MSI Afterburner (main tool)
- Install at least one benchmark (3DMark preferred)
- Install at least one stress test (FurMark or OCCT)
Phase 1: Baseline Setup
Step 1 — Reset to Stock
Open MSI Afterburner → Click "Reset" button (the curved arrow)
This sets all sliders to default.
Step 2 — Set Power and Temp Limits
In MSI Afterburner:
┌────────────────────────────────┐
│ Power Limit:    ↑ [120%]  ... │ ← MAX it out (usually 110-120%)
│ Temperature Limit: ↑ [90°C] ...│ ← Set to 88-90°C for safety
│ Core Voltage:    ↑ [+0]    ...│ ← +0 until Phase 4
│ Core Clock:      ↑ [+0]    ...│ ← +0 (we'll increment)
│ Memory Clock:    ↑ [+0]    ...│ ← +0 (we'll increment)
│ Fan Speed:       ↑ [Auto]  ...│ ← Start auto, adjust later
└────────────────────────────────┘
Step 3 — Verify Baseline Performance
Run benchmarks and record scores:
1. 3DMark Time Spy → Default run → Record "Graphics Score"
2. 3DMark Speed Way → Default run → Record score (RT benchmark)
3. Run for 5 minutes → Record max temp, max fan speed, power draw

Write down:
  Baseline FPS: _______
  Baseline GPU temp: _______
  Baseline hotspot: _______
  Baseline VRAM temp: _______
  Baseline power draw: _______
Phase 2: Core Clock Overclocking
Method: Incremental + Stress Test
For NVIDIA GPUs (40/50 series):
Step 1: +50 MHz core clock → Run Time Spy → If pass, go to Step 2
Step 2: +15 MHz → Run Time Spy → If pass, go to Step 2 again
Step 3: Repeat Step 2 until crash or artifact
Step 4: Back off 30 MHz from crash → This is your stable core OC

For AMD GPUs (RX 7000/9000 series):
Step 1: +100 MHz core clock → Run Time Spy → If pass, go to Step 2
Step 2: +20 MHz → Run Time Spy → If pass, go to Step 2 again
Step 3: Repeat Step 2 until crash or artifact
Step 4: Back off 40 MHz from crash → This is your stable core OC
Expected Gains
| GPU | Typical Core OC | FPS Gain (1440p) |
|---|---|---|
| RTX 5090 | +120-180 MHz | +2-4% |
| RTX 5080 | +150-200 MHz | +3-5% |
| RTX 5070 Ti | +150-200 MHz | +3-5% |
| RTX 5070 | +180-220 MHz | +4-6% |
| RTX 4070 Super | +150-200 MHz | +3-5% |
| RX 9070 XT | +200-300 MHz | +5-8% |
| RX 9070 | +250-350 MHz | +5-10% |
Stability Test Thresholds
After each increment:
- Run 3DMark Time Spy (1 loop): Must complete without crash
  → If crash: reduce by 15 MHz, test again

- After finding stable OC: Run Time Spy Stress Test (20 loops)
  → Pass threshold: 97%+ stability
  → If lower: reduce by 15 MHz, retest

Final verification:
- 30 minutes of gaming (most demanding game you play)
- No crashes, no artifacts
- GPU temperature stays below 85°C
- Fan noise is acceptable
Photo by Andrey Matveev on Pexels
Phase 3: Memory Overclocking
Memory overclocking is more impactful than core OC for most modern GPUs.
Method
Step 1: Set your stable core OC from Phase 2
Step 2: +500 MHz memory clock → Run Time Spy→ If pass, go to Step 3
Step 3: +200 MHz → Run Time Spy → If pass, go to Step 3 again
Step 4: Repeat Step 3 until crash or artifacts
Step 5: Back off 300 MHz from crash → This is your stable memory OC

Critical: Memory overclocks degrade over time.
  - Test memory OC for 2+ hours (not 30 min)
  - One month later, reduce by 100 MHz (memory degrades)
Memory OC Headroom by GPU
| GPU | Memory Type | Typical OC | Bandwidth Gain |
|---|---|---|---|
| RTX 5090 | GDDR7 32 Gbps | +500-1000 MHz | +3-8% |
| RTX 5080 | GDDR7 30 Gbps | +500-1000 MHz | +3-8% |
| RTX 4070 Super | GDDR6X 21 Gbps | +500-1000 MHz | +3-8% |
| RX 9070 XT | GDDR6 20 Gbps | +500-1000 MHz | +3-8% |
| Arc B580 | GDDR6 19 Gbps | +200-500 MHz | +2-5% |
Detecting Memory Errors
Memory errors are more dangerous than core instability because they can corrupt data:
Signs of memory instability:
1. Artifacts (visual glitches, flickering)
2. Driver crashes/code 43 in Windows
3. Benchmark scores DECREASING with more OC (ECC retries)
4. Color banding or weird colors in games
5. Sudden save file corruption

Check in GPU-Z → "Memory Errors" section:
  - ANY memory errors = unstable
  - Reduce by 200 MHz immediately
Undervolting: Better Than Overclocking
Why Undervolt
Undervolting gives you:
- Same performance at lower temps (-5 to -15°C)
- Same performance at lower power draw (-20 to -80W)
- Lower fan noise (fans spin slower)
- Same (or higher) boost clocks due to thermal headroom

vs Overvolting:
- Overvolting: +5% perf, +10°C, +50W = NOT worth it
- Undervolting: 0% perf gain, -10°C, -50W = Always worth it
NVIDIA Undervolt Method (Curve Editor)
1. Open MSI Afterburner → Ctrl+F (opens Voltage/Frequency curve)
2. Find 0.9V on the X axis (or whatever voltage you want)
3. Click on the point at 0.9V → Drag it UP to your target frequency
   → Example: For RTX 4090/5090, target 2700 MHz at 0.9V
4. All points to the right of this should be LOWERED
   → Click and drag each point to below your target line
   → Or: Hold Shift, select all points right of target, drag down
5. Click Apply (✓)
6. The curve should now be FLAT after your target point

Result: GPU will never go above 0.9V
  = Same performance at much lower temps and power
AMD Undervolt Method
1. Open AMD Adrenalin → Performance → Tuning
2. Enable "GPU Tuning" → "Advanced Control"
3. Set "Voltage (mV)" to a lower value:
   - RX 9070 XT: Try 1050 mV (stock ~1150 mV)
   - RX 9070: Try 1000 mV (stock ~1100 mV)
   - RX 7900 XTX: Try 1050 mV (stock ~1150 mV)
4. Test with Time Spy → If stable, go lower by 10-15 mV
5. If crash, increase by 10 mV
6. Find the lowest stable voltage

Expected results:
  - RX 9070 XT: -8-15°C at same performance
  - RX 9070: -10-12°C
  - Power savings: 30-80W
Undervolt vs Overclock Results
| GPU | Stock | Overclocked | Undervolted | Undervolt + OC |
|---|---|---|---|---|
| RTX 5090 | 100% perf, 450W | 104% perf, 500W | 99% perf, 350W | 103% perf, 400W |
| RTX 5080 | 100% perf, 360W | 105% perf, 400W | 99% perf, 280W | 104% perf, 320W |
| RX 9070 XT | 100% perf, 340W | 107% perf, 380W | 98% perf, 260W | 105% perf, 300W |
Undervolt + modest OC is the sweet spot for 2026 GPUs.
GPU-Specific Guides
RTX 5090
| Setting | Typical Range | Notes |
|---|---|---|
| Core clock | +120-180 MHz | 120 MHz is almost always safe |
| Memory clock | +500-1000 MHz | +1000 often stable on GDDR7 |
| Power limit | 120% | 600W peak (PSU: 1000W+ recommended) |
| Voltage | 1.0V (undervolt) or stock | Do NOT exceed 1.1V |
| Expected FPS gain | +3-6% | Mostly from memory OC |
| Best practice | Undervolt to 0.925V at 2700 MHz | Save 80-100W at near-stock perf |
RTX 5080
| Setting | Typical Range | Notes |
|---|---|---|
| Core clock | +150-200 MHz | Good headroom |
| Memory clock | +500-1000 MHz | GDDR7 overclocks well |
| Power limit | 120% | ~420W peak |
| Voltage | 1.0V undervolt | Big power savings |
| Expected FPS gain | +5-8% | |
| Best practice | Undervolt +100 MHz OC | Best perf/watt |
RTX 5070 / 5070 Ti
| Setting | RTX 5070 | RTX 5070 Ti |
|---|---|---|
| Core clock | +180-220 MHz | +150-200 MHz |
| Memory clock | +500-1000 MHz | +500-1000 MHz |
| Power limit | 120% | 120% |
| Expected gain | +6-10% | +5-8% |
| Best practice | +200 core, +800 mem, undervolt 0.95V |
RX 9070 XT
| Setting | Typical Range | Notes |
|---|---|---|
| Core clock | +200-300 MHz | AMD has more headroom |
| Memory clock | +200-500 MHz (Frontier)/+500-1000 MHz (GDDR6) | Watch for memory errors |
| Power limit | 115% | ~390W peak |
| Undervolt target | 1000-1050 mV | Try 1025 mV first |
| Expected FPS gain | +6-10% | AMD OC scales better than NVIDIA |
| Best practice | Undervolt to 1050 mV + 200 MHz core OC |
Stress Testing: How to Verify Stability
Minimum Testing Protocol
| Stage | Test | Duration | Criteria |
|---|---|---|---|
| Quick check | 3DMark Time Spy | 15 min | Complete without crash |
| Stability | Unigine Superposition (1080p Extreme) | 30 min | No artifacts, temp <85°C |
| Memory | OCCT VRAM test | 30 min | Zero memory errors |
| Thermal | FurMark (not for general use, high heat) | 10 min | Hotspot <100°C |
| Real-world | Most-demanding game | 2+ hours | No crashes, stable FPS |
What "Stable" Means
✅ Stable = All of:
  - 3DMark Time Spy Stress Test: 97%+ pass
  - 30 minutes Unigine Superposition: no artifacts
  - 30 minutes OCCT VRAM: zero errors
  - 2 hours gaming: no crashes
  - Daily use for 1 week: no driver timeouts

❌ NOT Stable if:
  - Any crash in any benchmark
  - Artifacts at any point
  - Driver timeouts
  - Benchmark scores worse than stock
  - Memory errors (even 1!)
Daily Driver Stability
After you find your "stable" OC:
1. Run Time Spy each morning for 3 days (5 min each)
2. If it passes all 3 days → OC is stable as daily driver
3. If it fails on day 3 → Reduce by 15 MHz core or 100 MHz memory

Memory degradation:
  - Memory overclock often degrades after 2-4 weeks
  - If you crash after being stable for weeks → reduce memory by 100-200 MHz
Related Reads
- Best GPU for 1440p 144Hz Gaming (NVIDIA vs AMD 2026)
- GPU Temperature Guide: What's Too Hot for Your Card?
- RTX 5090 vs H100 for AI: 2026 Break-Even Analysis
Key Takeaways
- Follow the 3-phase process: baseline stock performance, incrementally overclock core (+15 MHz steps) and memory (+50 MHz steps) with stress testing at each step, then undervolt for stability and efficiency—never exceed 1.1V (NVIDIA) or 1.2V (AMD).
- Memory overclocking yields +5-15% performance in bandwidth-bound scenarios but requires 2+ hours of stability testing; reduce by 100 MHz after a month to account for degradation and monitor GPU-Z for memory errors (any errors = unstable).
- Undervolting is safer and more effective than overclocking: target 0.9V–1.0V (NVIDIA) or 1000–1050 mV (AMD) to maintain stock performance with -5–15°C lower temps, -20–80W power savings, and quieter fans—combine with a modest +100–200 MHz core OC for best results.
- Stability requires passing all tests: 3DMark Time Spy Stress Test (97%+ pass), 30 minutes of Unigine Superposition (no artifacts), 30 minutes of OCCT VRAM (zero errors), and 2+ hours of real-world gaming—daily driver stability demands 3 consecutive days of Time Spy passes.
- Modern GPUs (RTX 5090, RX 9070 XT) have minimal headroom: expect +3-8% core clock gains on NVIDIA and +5-10% on AMD, with memory OC providing the most consistent performance uplift—prioritize undervolting + memory OC over aggressive core clocks.
- Never exceed safe temperature limits: core <85°C (ideal <75°C), hotspot <100°C (ideal <85°C), VRAM <95°C (GDDR6X runs hot)—reduce clocks or improve airflow if thresholds are breached to avoid long-term degradation.
Frequently Asked Questions
Undervolt has more practical benefit for most users.
It reduces power draw by 20-40%, drops temperatures 5-15°C, and fans run quieter. Performance is within 1-2% of stock. Overclocking gives small gains at the cost of more heat and noise. Best approach: undervolt first, then add a small core OC if you want more perf.
Is overclocking safe for my GPU?
For core clock only (no voltage increase): yes, virtually no risk. Extreme overvolting or VBIOS mods can damage hardware. Stick to: +150-200 MHz core within stock voltage, +500-1000 MHz memory. Test for stability before daily use. Undervolting is safer than overclocking and often gives better results.
How much performance can I really gain?
+3-8% on NVIDIA RTX 40/50 series, +5-10% on AMD RX 7000/9000 series, +5-15% from memory OC in bandwidth-bound scenarios. Modern GPUs are pre-binned close to their limits. The days of +20-30% gains from overclocking are gone.
What temps are safe for my GPU?
Core: ideally 65-75°C under load, max 85°C. Hotspot: ideally 75-90°C, max 100°C. VRAM (GDDR6X): ideally 80-90°C, max 105°C. If any exceeds these thresholds, reduce OC or improve case airflow.
Should I overclock or undervolt?
Undervolt has more practical benefit for most users. It reduces power draw by 20-40%, drops temperatures 5-15°C, and fans run quieter. Performance is within 1-2% of stock. Overclocking gives small gains at the cost of more heat and noise. Best approach: undervolt first, then add a small core OC if you want more perf.
Does overclocking void warranty?
In most regions: no. MSI, ASUS, Gigabyte, and EVGA (RIP) generally honor warranty for software OC. Physical damage (shunt mod, VBIOS flash) voids warranty. NVIDIA and AMD's reference cards have stricter policies — check your specific card. Software overclocking via Afterburner is considered normal use.
What happens if my overclock is unstable?
At worst: a crash, a reboot, or a driver timeout. Save your work before testing. Reduce clock by 15-30 MHz and retest. Memory OC instability can corrupt save files during gaming — this is the most common real risk. Always save game progress before extended testing sessions.
More from Synor

Recommended for you




Comments
Sign in to join the conversation
No comments yet. Be the first to share your thoughts!